Contents:
Steps to follow to get started with Beeping
Step 1: Register in the Beeping Software
Step 2: Log in and activate your shop
Step 3: Create and link your products
Step 4: Create and link your packs
Step 5: Incoming goods
Step 6: Ordering
Useful links
- Enquiries and support
- Problems with deliveries and courier services
- Help centre
- Payments and invoicing
-
Additional information, metrics and percentages on your orders
Step 1. Register in the Beeping Software
Once you decide to start working with Beeping, we will follow this process together:
- You will receive an email to sign the service contract.
- Once both parties have signed the contract, you will receive an email to establish your user credentials on the Beeping platform. Please note that access is valid for 1 hour, after this time, contact your sales manager to request access again.
- Once you have established your credentials, you will be able to log in to the Beeping platform.
Before you start using the software, we recommend that you get to know the interface. Click here to learn more
Step 2. Connect and activate your shop
2.1 Connect your store
- Shopify
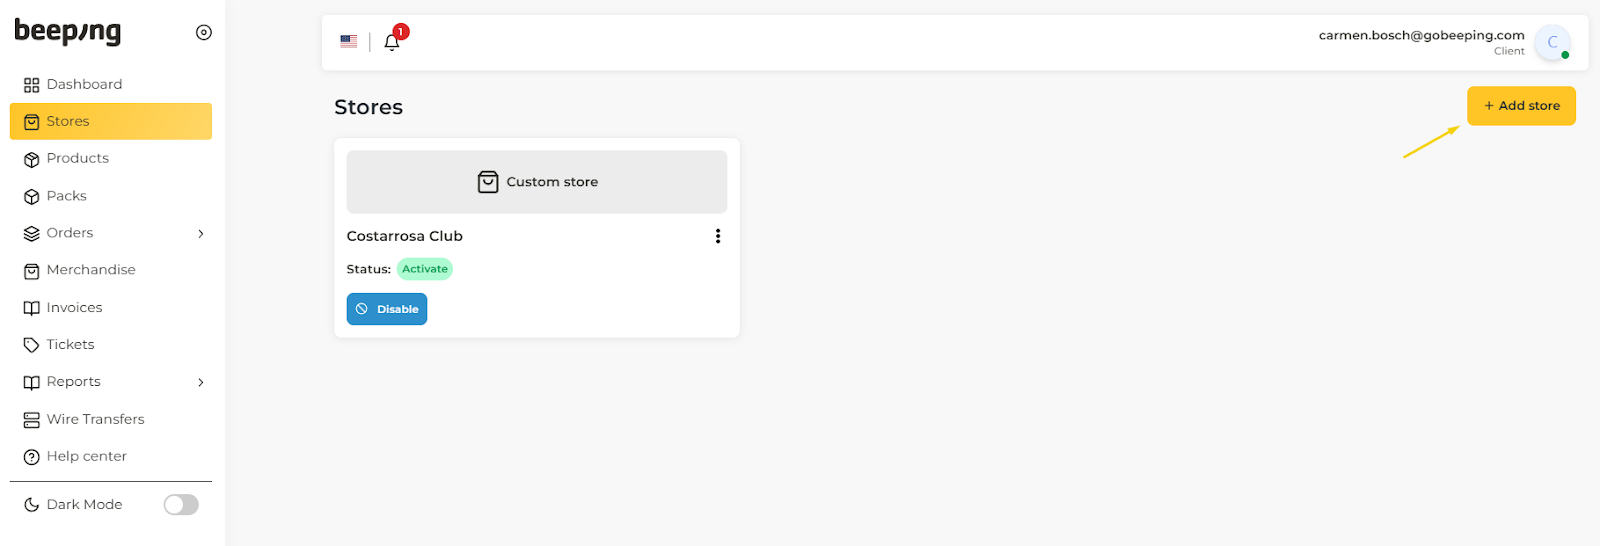
In the Stores' section, click on the Add Store button.
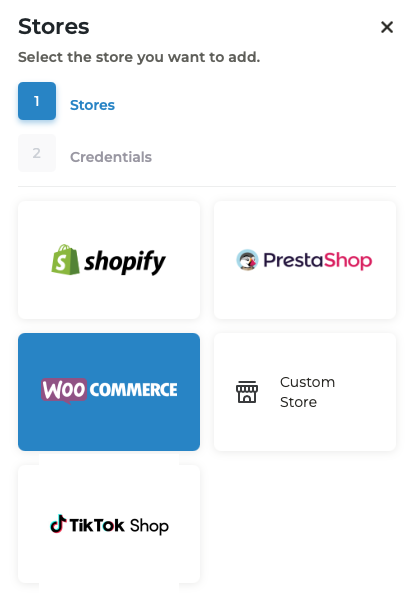
A window will open and you will be displayed by the Shopify or Woocommerce options. You will need to select the platform corresponding to your store. In the case of a Shopify shop, click on the Shopify option in the pop-up window, and click Next.
Click on Application Installation.
Your Shopify store will open to confirm the installation of the app. Click on Install.
Once the app has been installed in Shopify, the shop panel on the Beeping platform will open again and the shop we have just created will appear.
- Woocommerce
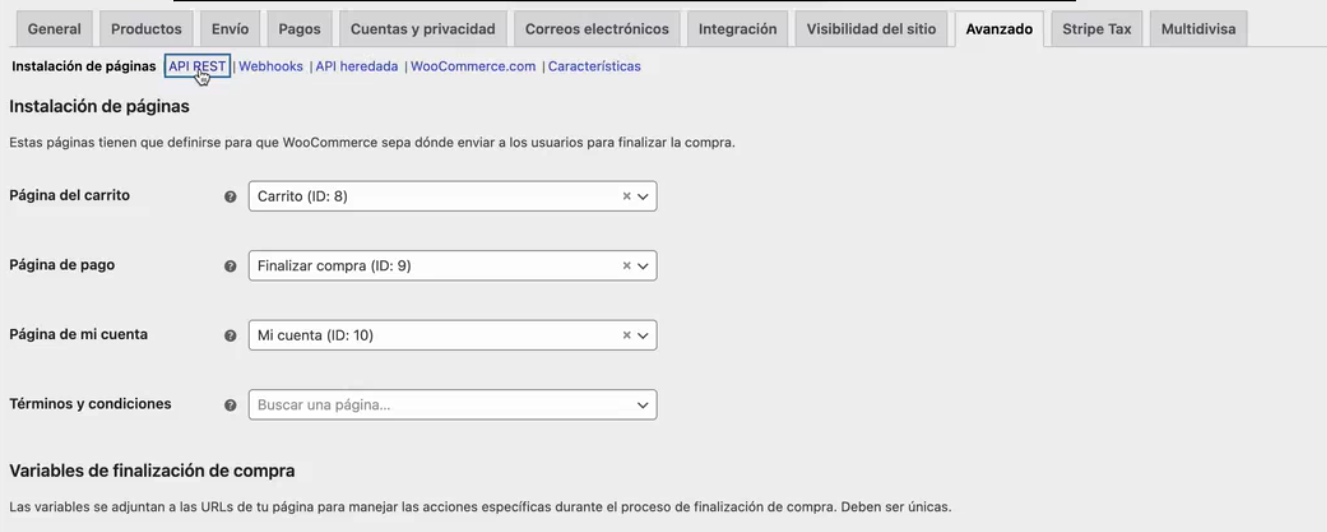
Inside the Woocommerce store manager, click on “Settings”, then go to the "Advanced" tab and click on “API REST”.
Click on "Add key".
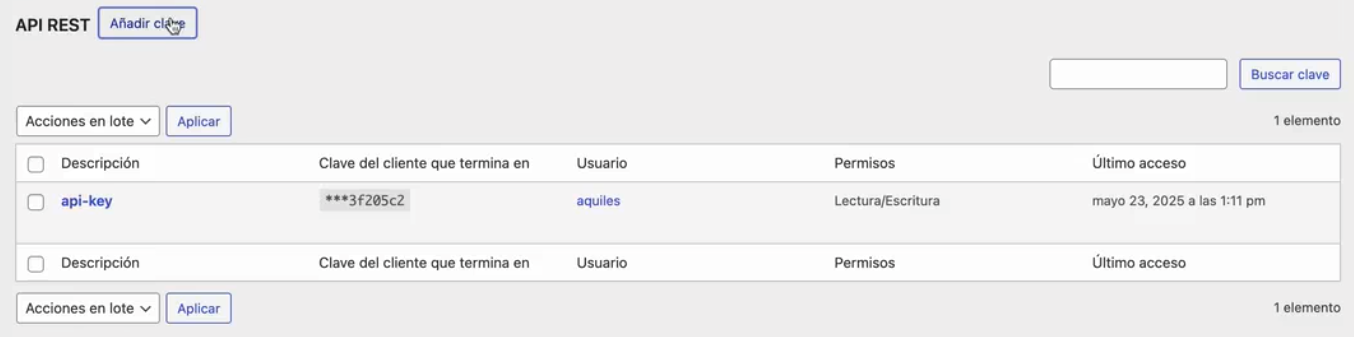
Complete the fields: Description, User and Permissions and click on “Generate API Key”.
Let's go to the Beeping App:
In the Stores section, click on the Add Store button.
A window will open with the available store options, click on the “Woocommerce” option in the pop-up window.
The next step is to complete the credentials you have previously created in your woocommerce store:
- Name: Complete with the name of your store
- Url: Complete with your store url
- Client_key: Fill in with client key
- Client_secret: Complete with the client's secret password.
Once you have completed all the fields, click “Save” and you will have your Woocommerce store connected to Beeping.
2.2 Activate your shop
Once you have connected the shop, we are now going to activate it, we share with you a guide where you will discover the step by step configurations necessary to activate the shop: Click here
Once you have configured these options, your shop will finally be activated.
Step 3. Create and link your products
- How to create a product: Click here
- How to link a product: Click here
- Create and link another SKU (2nd example): Click Here
- Create One Tick upsell: Click here
- Create warranty/priority shipping/insurance products: Click here
Can I sell the same product in two shops?
If you want to sell a product in several stores, you will only have to create it once and link it to the different stores where you want to sell it. The stock of a product is common for all the stores of the same user.
Each variant (color, size, material, etc.) is a different SKU. Ex: if you sell 2 sizes of the same product, in Beeping you will have to create 2 different products, each one with its respective barcode.
Important
All products must arrive at the Beeping warehouse labelled with a barcode. We share with you a guide where we explain how to generate barcodes and what requirements they must meet to be valid: Click here
Step 4. Create and link your packs
- Create pack, buy 1 get 2, same SKU: Click here
- Create pack, buy 1 get 2, different colors: Click here
- Create quantity offers: Click here
- Create variants in your quantity offers: Click here
Packs are used when you have product variants within Shopify. Ex: you will create a 2 unit pack of the "Car antenna" in Beeping and link it to the 2 unit variant in Shopify.
If you have upsell in apps like Easy Sell or Releasit COD, the software will automatically detect it. Ex: you have quantity offers of 1, 2 and 3 units in the COD form. You need to link the product "Car antenna" to the unit product in Shopify. When someone buys one of the quantity offers, Beeping will automatically detect the units that compose it.
Step 5. Goods receipts
How to make a goods receipt?
We share with you an explanatory video that will guide you through the process of making a goods receipt: Click here
Step-by-step guide: Click here
What are the requirements for the shipment of goods?
Requirements for the shipment of goods: Click here
Shipping address for goods
The merchandise should be sent to the following address:
Alaquàs (Valencia, Spain)
46970
Instead, we suggest using couriers such as DHL, FedEx, UPS, among others, which allow better identification and management of these shipments.
Step 6. Ordering
- Troubleshoot error "There are unlinked items": Click here
- How to edit and confirm orders? Click here
- How to edit orders pt. 2? Click here
- How to cancel orders? Click here
- Order summary and data + add users: Click here
- Order columns and filters: Click here
Important ordering information
Cut-off time:
- Monday at 14:00 (Madrid time)
- Tuesday to Friday at 15:30 (Madrid time)
- All orders confirmed after this time will be shipped the following day.
Important:
Remember to confirm your orders 15 minutes before the cut-off time so we can process them on the same day. Otherwise, they will be pending shipment until the next business day.
You can only cancel orders with the following status: "Pending Stock", "Pending", "To be confirmed".
All changes you want to make to an order, must be done before marking it for shipping.
Useful links
Beeping customer service enquiries and support
Find out how to open tickets to ask questions and request support through the following link: Click here
Incidents with shipments and couriers
Learn how to manage incidents with shipments and couriers through the following link: Click here
Help Center
Explore our guide to learn how to access the Help Center and solve your doubts easily: Click Here
Payments and Billing
At Beeping we do daily payments. You can request balance withdrawals from your balance to your bank account every day. Please note that from the time your order is delivered to the customer until the refund is reflected in your balance, it may take 24 to 48 hours.
The cash flow for your COD orders is the following:
- The customer pays the courier when receiving the COD order.
- The courier pays Beeping.
- The day after receiving the order refund by the courier, Beeping uploads it to the customer's wallet.
Check the status of your refund through this link: Click here
Here's how we manage payments and invoices in the wallet on a weekly basis:
- Daily payments. Beeping will upload to the wallet the refunds paid by the courier every day (as long as the courier has made refunds the previous day). Note: on holidays, the courier does not make refunds, so Beeping will not be able to upload them to the wallet the next day as stated.
- Daily balance withdrawals. You can request a daily withdrawal.
- On Fridays an advance invoice is issued which includes: weekly shipping estimate €3.60 + handling estimate €1.70
At the beginning of each month, the invoice is issued with the total cost for the previous period, reflecting actual shipping and handling costs. This amount is reduced by any prepayments made during the month.
This is because the couriers inform Beeping of each customer's total shipments and returns at the beginning of each month. For this reason, estimated charges are made on a weekly basis.
On the last days of the month it is likely that requests for balance withdrawals will not be made, as priority is given to the available balance in the wallet for the payment of the monthly invoice.
We will do our best to avoid any inconvenience, but if we cannot avoid it, it is important for you to know that you can make a claim: Click here. We will do our best to solve any difficulties that have arisen.
If you have any further questions, you can consult our guide for detailed information on invoicing and to resolve your doubts: Click here
Additional information, metrics and delivery rates of your orders.
Get an update on the delivery rate of your orders: Click here